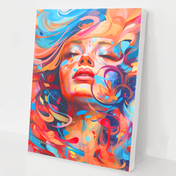
Welcome to the wonderful world of Paint Plot Diamond Painting, otherwise known as Diamond Art, 5D Diamond Paintings or Paint with Diamonds.
When you order your Diamond Painting Kit with us here at Paint Plot you will receive everything you need to complete your own stunning piece of art work.
It comes beautifully boxed and presented, which makes it the perfect gift.
Inside the box, you'll find
- A premium diamond painting canvas
- Two diamond pens and different sized applicators (the square drills or pens let you place up to ten diamonds at once in large areas)
- Colour coded resin diamonds
- A wax strip
- A plastic tray to work from.

Our diamond paintings are full drill, which means the entire canvas is covered with diamonds and they are large, 40cm by 50cm (16 inch by 20 inch) canvases.
On this page, we have collated our top 10 tips and tricks for beginners of Diamond Paintings. This may also be helpful for those of you who have completed a few diamond paintings already.
- Pick a design you will enjoy – If this is your first Diamond Painting you will invest a lot of time into this rewarding new hobby, so pick a subject you love.
- Do it in comfort – We recommend choosing an area where you have plenty of space and light, natural light if possible. This may vary and you may prefer to use a flat surface like the kitchen table, then other times you may need to sit up straight and use an easel.
- Eliminate static from Diamonds – The diamonds can have a lot of static and therefore can be difficult to pour from the bag and to separate on the tray. Simply cut a small square from a tumble dryer sheet and place it in the bag and shake it around, this will eliminate the static.
- Prepare your canvas – Your canvas will come rolled and therefore may need to be straightened out. Simply lay the canvas flat, peel the top layer back then reseal, do the same with the bottom half and the canvas will be flat and ready to start. Otherwise, you could place a tea towel over the top and on a very low setting iron over very gently or simply place a few heavy books on the canvas overnight.
- Have a plan for storage – This is very important because you don’t want to lose those tiny sparkly diamonds! We suggest purchasing some small resealable bags or some sort of storage. A weekly tablet organiser or something similar to this would work perfectly. You can then mark the numbers on these to make it easy to select when you need them.
If you have an egg carton lying around the house, this will also work!
- Where to start – Our best tip or trick for Diamond Paintings is to start from the top and work to the bottom. There are a few reasons for this. Firstly when you start from the top and work down you are pushing your canvas upwards, otherwise you would be pushing it downwards and into your lap forcing you to turn your canvas around and work upside down.
Secondly, as you peel the top layer back you only want to expose the area you are working on otherwise your arm or jumper will stick to the adhesive layer and may cause fluff to catch on your painting.
Another great tip is to just cut the top layer into small squares as you go, so as to only expose the area you are working on. With this method will you can start from the left or the right side.
Work in a checkerboard pattern – Many customers find it difficult to line up the diamonds in neat rows in large colour block areas. If you use the checkerboard method, you are placing every second square diamond and this is making sure you are putting each diamond into its own square ensuring straight lines.
Then you go back and fill in the rest, which is really satisfying.

- Air bubbles – Occasionally there can be air bubbles in the canvas. You can simply take a small blade and make a small incision on the surface of the bubble. Be sure to be very gentle so that you do not slice the canvas.
- Blu Tac – A handy hint is that you can use blu tac instead of the wax, it works just as well. This helps if you’ve been a little heavy handed on the wax early on in your painting.
- Replace the top layer – After you have finished working on your Diamond Painting for the day make sure you always replace the top layer. This will ensure that your canvas will be protected from dust or any spillage that may occur.
We hope these Paint Plot Diamond Painting tips and tricks have been helpful. We are always grateful when we receive any new tips that you have discovered and would like to share with the rest of the community.
Most of all, don’t forget to hang your beautiful artwork on your wall and share it will us @paintplotdiamonds or in our closed facebook community.


